Wonky Borders – Part 2
March 28, 2019 7 Comments
I have waited a while to add to the Wonky Borders Quilt saga – I wanted to wait until the quilt was done and delivered to my customer before writing about it. I feel that this quilt was jinxed from the beginning and, if I wrote about it before being delivered, even MORE would go wrong!
I did take the remaining borders off of the (partially quilted) quilt and wrestled with the “octopus” (also known as “the quilt”) and re-stitched the borders. I kept the zippered leaders on for about three minutes before I decided to take them off – which made things a little easier!
After the borders were re-sewn, I then put the quilt back on the machine and finished the border quilting. It is AMAZING how much easier borders are to quilt when they are smooth, flat and square!
Then, to finish this project, I trimmed the quilt and put the binding on the front of the quilt. My customer is stitching the binding to the back of the quilt.
Here are photos of the finished quilt. Click on any photo for a larger view
This quilt is 110 inches wide!

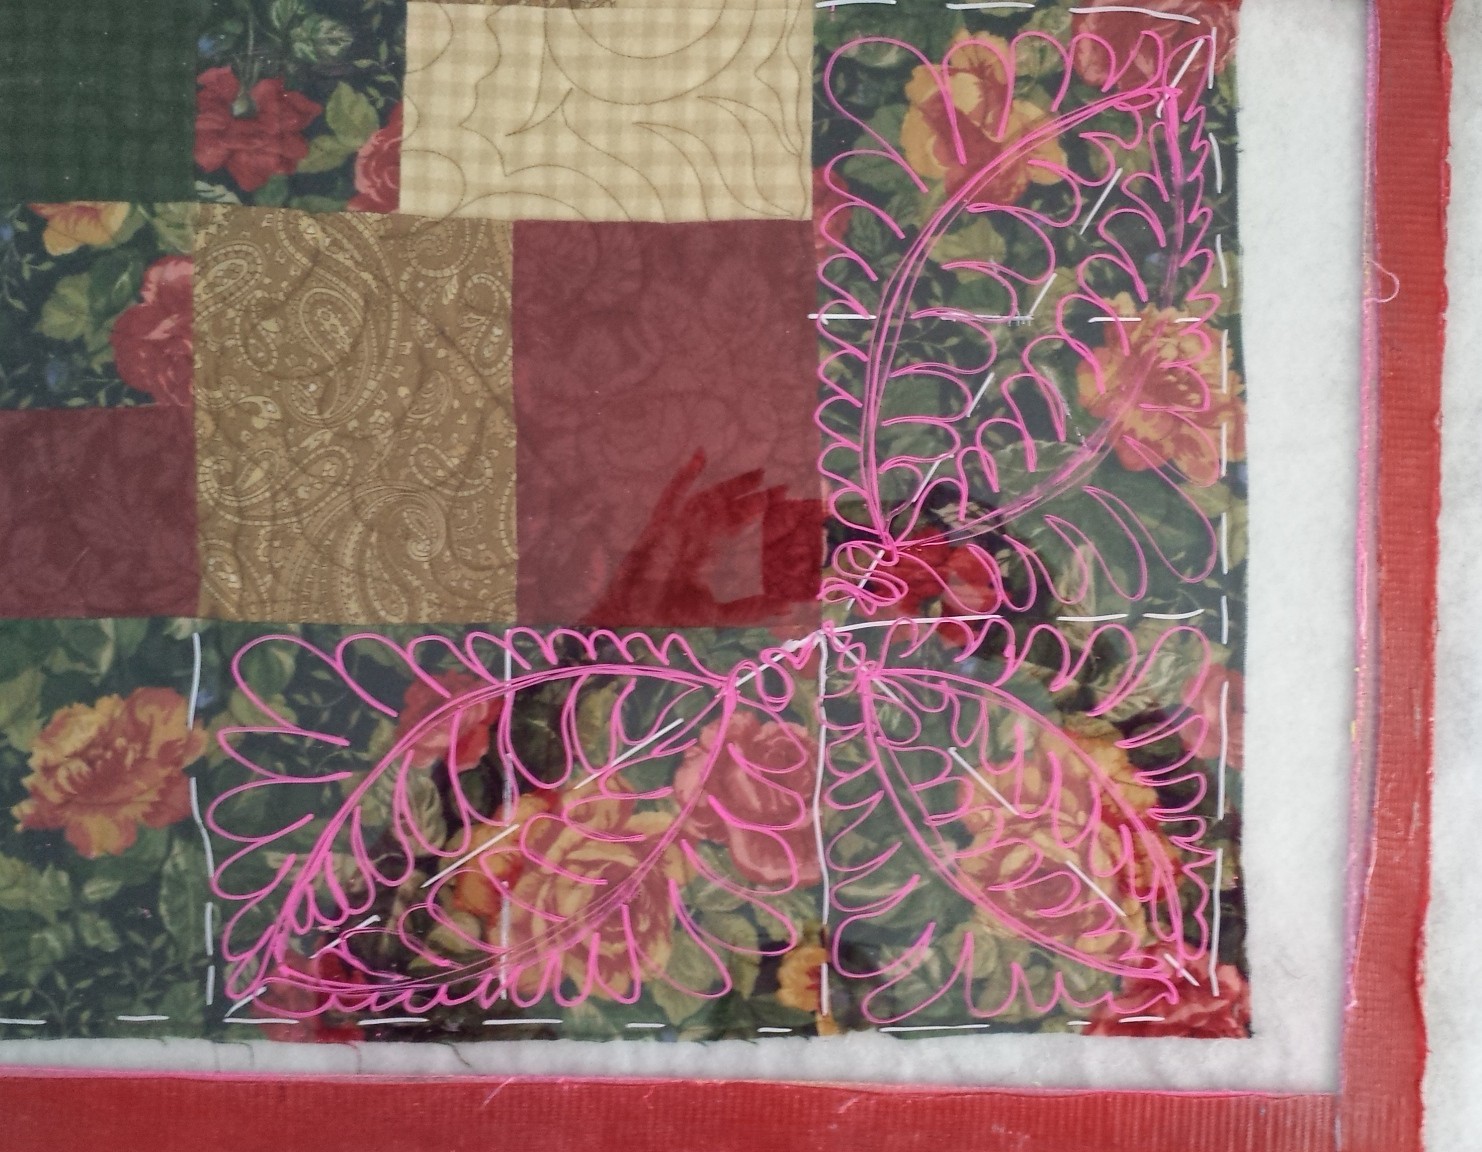
The quilting in the blocks. The green “points” are folded and I could not quilt on top of them.

Quilting detail in the side borders.

The re-pieced bottom border. SOOO much better!

The borders on this quilt were the main issue, but like I said above, this project was jinxed from the start! Here is why I say this –
My customer lives 1,700 miles from me and she shipped the quilt to me. No problem there. My problem was that when it arrived, I was in the middle of having new floors installed in my house. My quilting machine was wrapped in plastic and pushed up against a wall for nearly three weeks! Nothing was getting quilted during that time! (The floors look great and I love them!)
Here is my quilting machine, all wrapped up, and my son installing my new floors.

By the time I could get to her quilt, it was getting near fall, winter and the Christmas holidays. I knew that this was going to be a big project, so I waited until I could block out at least a week of my life to work on this quilt, which brought me to late January.
I got the quilt out and start measuring it – which is the first time I have looked at the quilt since taking it out of its original shipping box. I realize that the quilt is 10 inches wider and a few inches longer than what my customer said it was! I start measuring the backing fabric. You guessed it, it wasn’t long enough! After several emails with my customer and after a huge snowstorm, I go to the quilt shop and purchase some fabric and stitch the backing together. Then there was the border issue and I finally finished the quilt.
But wait, there’s more!
I had to ship the quilt back to my customer. No problem – or so I thought! I charged her for the shipping, but, because the quilt was so big it wouldn’t fit into the box I was planning on shipping it in. I found a larger box (15 x 30 x 8 inches!) at the UPS store for only $10! Because the box was bigger and the quilt weighed a little bit more, the shipping was MUCH more than anticipated and what I charged my customer!
At least the quilt was delivered safe and sound and my customer LOVES the quilting and the finished quilt. That is all that matters!
Here is the question you may be asking – With ALL that was happening with this quilt, did I charge my customer more $$$, especially for the labor with the borders.
The answer – No, I did not. Here’s why.
I have quilted several quilts for this customer over the years and this is the first one I have had any problems with.
When I first put the quilt on the machine and saw the pleats in the borders, I should have worked on the borders then instead of waiting until I did. (Note – it is MUCH easier to take off borders when the quilt is un-quilted.)
If I had measured the quilt when I received it, I would have noticed the difference in the size of the quilt and the backing and could have worked with my customer at that time to increase the price due to the larger size of the quilt and the backing fabric issues.
I “absorbed” the extra costs of the shipping
I feel that some of these problems were my issues and should not be charged to my customer.
No matter how good a quilter you are, no matter how long you have been doing this, there are still times when the Quilting Goddess keeps you humble. Which is what happened with me. BIG TIME!
The good news is that my customer is working on sending another quilt to me! You can bet that I will inspect, measure the quilt twice – or three times – when I receive it.
FWIW – the new quilt is also HUGE, 110 X 134 inches!!!

When the floor was installed, did you just roll the machine to the part of the floor that was done and then continue on with the unfinished part of the floor? I’d like a new floor and we have been discussing how to do it since it with be DIY. Is that vinyl plank that you put in? If so any concerns about the weight of the machine making marks in the vinyl?
Hi. When I installed my new floor, we wrapped my quilting machine in plastic and pushed it up against a wall. Then we took out the old floor on the “exposed” part and laid the new floor down. When that was done, we moved the machine over onto the new floor and repeated the process on the old floor that the machine was on.
My son is a “floor guy” and he did the installation. I choose an “engineered hardwood” that was called (I think) a commercial grade. This flooring is a step above home grade flooring. I choose the heavier duty flooring because of the machine weight and the extra walking one does around the machine.
So far, there are NO marks on the floor from the weight of the machine and I LOVE my new floors. PS I had the same floor installed throughout my house except for the bedrooms and the bathroom.
Thanks for sharing your perspective on this, Cindy.
My question is this: If you measured the quilt and found out that the
borders needed to be resewn, what would your normal procedure be?
Contact the customer, ask them to fix it (unless they are 1700 miles away)
and return it for quilting, offer to fix it for a ??? price, something else?
There comes a time when it’s not worth quilting something that you are
going to lose money on in the first place. That said, have you ever
told a customer you would not quilt a specific quilt?
I love reading your messages. Like I said before, thanks for sharing.
Terrie.
Terrie Kremer
Teaching Artist, Long-Arm Quilter
(208) 946-9706
http://www.MooseCountryQuilts.com
________________________________
Tales like this are why I resist taking in quilts for others. I know they thankfully aren’t all this way but it scares me! I am glad you got it worked out!
Hi Cindy! First of all, major congratulations on this quilt, it sure is beautiful and you went way above the usual and customary call of duty to finish it and make it shine. It’s amazing what we longarmers have to think up on the fly to deal with the challenges of this amazing profession! I’ve learned some lessons too – primarily around not having backing be big enough – with my new machine (Innova 26″) I’m using the red snappers and they take up some room on the top and bottom of the backing – so now I have set aside some extra “leaders” from prior projects – pieces of backing that are long and about 8 to 10 inches wide – and I am using these to add length to the backing when I need to. I measure the width I need and baste the leaders to that length so I don’t need to cut them. This is working out well for those times I need a little more.I’ve also gotten good at adding batting when the supplied batting is too short. And I’m measuring everything that comes in the door when it comes in – instead of waiting around and forgetting to do it. Thanks for posting- I really enjoy your blog!!Karyn Dornemann Karyn Dornemann Check out my longarm quilting services, barn quilts and custom quilts on Instagram at @karynquilts or go to my website! http://www.karynquilts.com Hudson Chiropractic – my day job! Voted Best Chiropractor 2017!!*** NEW *** ONLINE SCHEDULING @ Websitehttp://www.hudsonchiropractic.com
What a relief to get it done! And it looks SO much better. Sometimes we just want to get thru the job, and when this ugly problem arises, it hinders that! UGH! See Ann McCaleb ‘s website 12 pawsquilting.com for a tutorial on quilt surgery. Shows us how to fix it on the frame. I’ve done it more than once! And for your next topic Cindy, can you address how to do the shipping thing? I’m clueless on how that works. Thanks! Nancy
Thank you for sharing this saga. It is a good lesson… several lessons… for all of us. Gail in CO
_____