Wonky Borders – Again!
February 26, 2019 7 Comments
It has been a while since I have posted. I have been busy and “life” has been happening. I hope that everyone had wonderful Winter Holidays and a very belated Happy New Year to all!!
I finally had some time to work on a customer quilt and I want to share my experience with you. It has been a while since I have been surprised by wonky / bad borders on a quilt, but this one was totally unexpected!
Some details – The piecing pattern is Elegant Grace and this is a LARGE quilt 109 x 109 inches. My customer is out of state and sent the quilt to me way back in September. I knew it was going to be a large quilt and I knew it was going to be a big job and that is why I waited until I had a good chunk of time to work on it. And I am glad that I did!
Click on any photo for a larger view. (Because there are so many photos they are in Thumbnail size)

I did my usual measuring of the quilt before putting it on the machine and it measured “square” and put it on my quilting machine in my usual way. I was not sure what I was going to quilt in the borders so I machine basted the top borders. (I machine baste by changing my thread to a neon high sheen poly thread, turning off the stitch length regulator, then quilting longer stitches – about 3 stitches per inch – in a somewhat stippling pattern.) There was a little fullness in the top border, but nothing too drastic, so I thought!
I began working in the body of the quilt and pin basting the side borders as if I were “turning the quilt.” For a free video on turning the quilt Click Here
The side borders were having problems and there were several large-ish pleats showing up and lots of smaller pleats. I worked my way down to the bottom border, which had a little bit of fullness, but like the top border, it wasn’t too drastic, so I thought at the time.
After much thought – and a couple of cups of coffee – I decided to deal with the side borders before I did any more quilting. So I machine basted the bottom border, took the quilt off the machine, gave it a quarter turn and this is what it looked like.

A long view. Can you see the pleat in the middle?

A closer look at the middle of the border and the several pleats. I did some measuring and realized that there was about 4-1/2 inches EXTRA fabric in the outer border and and undetermined amount of extra fabric in the green border.
I contacted my customer with the choice of quilting the border “as is” and making pleats, etc., to make it lay flat or to take the border off, re-measure and re-sew before quilting. She chose to have the borders removed and re-sewn. A decision that I agreed with and, if this were my quilt, I would have done the same thing.
So …., here we go! I removed all three borders.


I laid out the borders and this is what I found. (I placed a piece of computer paper under the borders to show them better.


Unbelievable!!!!
I got to work and measured, sewed, trimmed and pressed and this is what I finished with. What a difference. The borders are a bit crumpled from the “man handling” it took to move the quilt around, but it is laying MUCH, MUCH flatter and smoother.

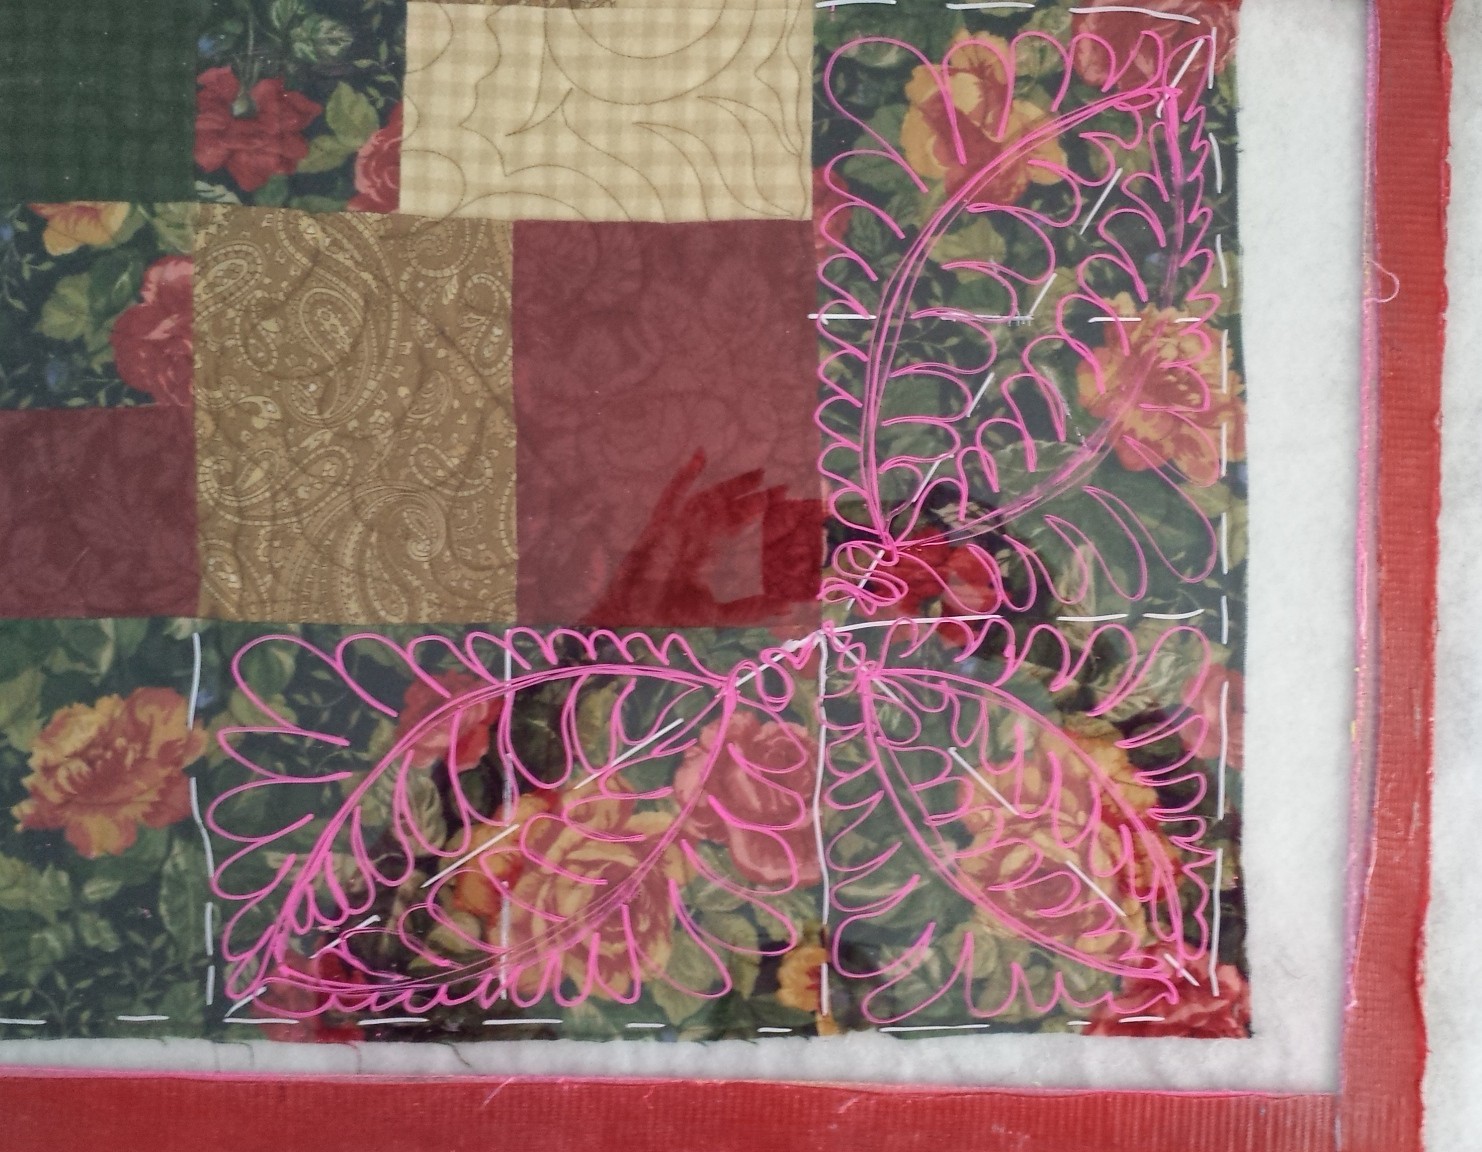
That was the first border! I had to do the same exact thing on the opposite border. I did that, put the quilt back on the quilting machine and then quilted these two borders. The quilting turned out really nice and I thought I was done except for the remaining two borders, which I had basted at the start of this project and that didn’t look “too bad.”
Boy, was I wrong!!!
I had to take the quilt off the machine because I was teaching a class. When I put the quilt back on the machine, assuming I could quilt the remaining borders and looked at the quilt. Here is what I saw –


These borders were as bad as the other borders!!! So, once again, I took out the basting stitches, and removed the border stitching. Before I went any further I checked the last border and … you guessed it! I took the basting and the stitching out of that border too! I also took apart a seam and then overlapped the fabrics to see how much extra fabric there was. (I have not yet taken apart the blue inner border.)

My goal for today is to take off the last blue inner border, take the quilt off the machine – I have zippered leaders and I’m thinking I will try to stitch the quilt with the leaders on – re-do the border, reattach the quilt to the machine and finally, quilt the last two borders.
Wish me luck and I’ll show you the finished quilt.
PS-When I was stitching the first set of the borders, I felt like I was wrestling a huge octopus! If I leave the zippered leaders on the quilt, I may feel like I’m wrestling an alligator AND and octopus!
