I belong to a couple of Facebook groups where people post photos of the projects they are working on or have completed. These groups are open to quilters of all skill levels – there are some professional machine quilters but most are “regular” piecers and (home sewing machine) quilters. Some of the quilt photos that are posted are quilted, most are not.
As I was cruising the photos I noticed photos of a very, very nicely, professionally quilted quilt. Then I read the caption with the photos, which read in part,
“The quilting took 10 days and 15+ bobbins…. the client is thrilled.” That REALLY caught my attention!
Note: I am specifically NOT posting the name of the Facebook group or the name of the quilter, who I don’t know. I have NO issue with the quilting that was done on this quilt and I am not criticizing the quality of the work.
From what I saw in the photos, and making a few assumptions, the quilt looked like it was a larger quilt, maybe even a King Size and it had a LOT of quilting on it. From looking at the photos, there appeared to be no ruler work, just all free hand. (The caption also said ” I don’t have a computer, this is all hand guided.”)
With this all stated, let’s begin to play the “pricing game.”
The quilter states that it took her 10 days to quilt this particular quilt. To me, that is worthless information. Did the quilter work on this quilt 10 – 12 hours per day or, did she work on this quilt when she had family visiting and could quilt only one hour a day?
(The quilting, which is very nice, is not THAT difficult to quilt and I probably could have done it in about 10 hours. There were a lot of feathers and free hand horizontal and vertical line fill in stitching. Also, in the Comments section, someone asked how long she had been quilting and she stated she has been quilting for 18 years.)
Let’s assume that the quilter DID work on this quilt for 8 hours a day. Let’s also assume that during that 8 hours she took a couple of potty breaks, a lunch break and had a couple of phone calls, for a total working time (standing at the quilting machine, actually working on the quilt) of 6 hours per day.
So with the assumption of 6 hours of working time, multiplied by 10 days equals a total of 60 hours working on this quilt.
Let’s do some math – Let’s assume she charged the customer per hour for this job.
60 hours x $10 per hour = $600
60 hours x $15 per hour = $900
60 hours x $20 per hour = $1,200
60 hours x $25 per hour = $1,500
60 hours x $30 per hour = $1,800
I am willing to bet that the price she charged was NO WHERE NEAR these numbers!
I looked up her name on the internet and found a website that had her name on it. (I am assuming that the person on the website is the same person who quilted this quilt. ) On her website she had her quilting prices listed.
Here is the price posted on the website –
“Custom quilting – $0.025 to $0.030 (per square inch) depending on the intensity of the quilting.”
Let’s do some more math –
Let’s assume that this was a Queen Size quilt, 90 x 108 inches, which is 9,720 square inches (si). At her high end of 3 cents per square inch, the total labor cost would be $291.60! (9,720 x .03 = 291.6) Let’s be nice and round that up to $300.
Let’s take the (assumed) 60 hours of quilting time and divide that into $300, which equals an hourly rate of – drum roll please! – $5 per hour!!!
Let’s assume this is a King Size quilt, 120 x 120 inches, which is 14,400si. Doing the same math as above ( 14,440 x .03 = $432) the hourly rate would raise dramatically to ….. wait for it ……… $7.20 per hour!!!
FWIW – the national minimum wage is $7.25 per hour (http://www.dol.gov/whd/minwage/america.htm, the minimum wage in Washington State where I live is $9.47 per hour and in Seattle, the minimum wage is now $15 per hour!
You can draw your own conclusions about this!
Why do I bring this up and write about this? I feel that many, if not most, professional machine quilters FORGET to add the numbers of hours they take to complete a quilt into their pricing equation.
Using the King and Queen size examples above, if the quilter could have done the quilting in 10 hours, her hourly wage would be about $30 per hour for the Queen size quilt and about $43 per hour for the King size!
And remember, you need to allow for your business expenses from these numbers!
I highly recommend that you begin to time yourself when you are working on EACH and EVERY quilt. You are not playing “beat the clock” to get a quilt completed in a certain amount of time. You are trying to determine how much TIME it is taking you, on average, to complete a quilt.
When you are standing at your machine, working on a quilt, write down the date and your start and stop time. Then, when you are finished with that project, total your hours and then divide that into the $$$ you are charging to find out how much you are earning per hour.
I know you will be amazed at the (low) hourly wage you are making.
How can you change this? I’ll write about that in the next post.
For the record – the last quilt I worked on was a large 93 x 110, Yellow Brick Road flannel quilt. It took me 4 days to complete the quilting. I did free hand feathers and swirls in the body of the quilt and a little more detailed free hand feather design in the borders. I put the quilt on the machine so that the long edge was attached to my leaders.

Click on the photo for a larger view
Note: I drove a school bus for nearly 20 years and we did our time cards, etc., in hundredths. So 15 minutes would be .25, 30 minutes would be .50, 45 minutes would be .75. This is how I keep track of my time when working on quilts and it is easy (to me) to calculate.
Day 1 – put quilt on the machine – .75 (45 minutes)
Day 2 – marked and quilted most of the top (as attached to the machine) border – .75
Day 3 – remainder of top border and body of the quilt – .75 + .75. Total of 1.5 hours.
Note: I was having problems with a sore muscle in my right arm and could only quilt about 45 minutes at a time before having to stop and rest.
Day 4 – two sessions of .75 each and 1 session of 1 hour. Total 2.5 hours
Total time worked on this 5.5 hours and I added an extra .5 “just because”, for a grand total of 6 hours working on this quilt.
I charged my customer $375 for the labor (93 x 110 = 10,230si x .035 = $358, rounded up to $375) which I divided by 6 hours = $62.50 per hour!
You can draw your own conclusions about this!
I welcome your thoughts and comments!
—————————————-
I received a comment about quilting the borders and I have been trying to post a photo in the comments reply section and I couldn’t do it. So I’m responding here –
No, I did not have to turn the quilt. I was able to quilt the border design at the same time that I quilted the body of the quilt.
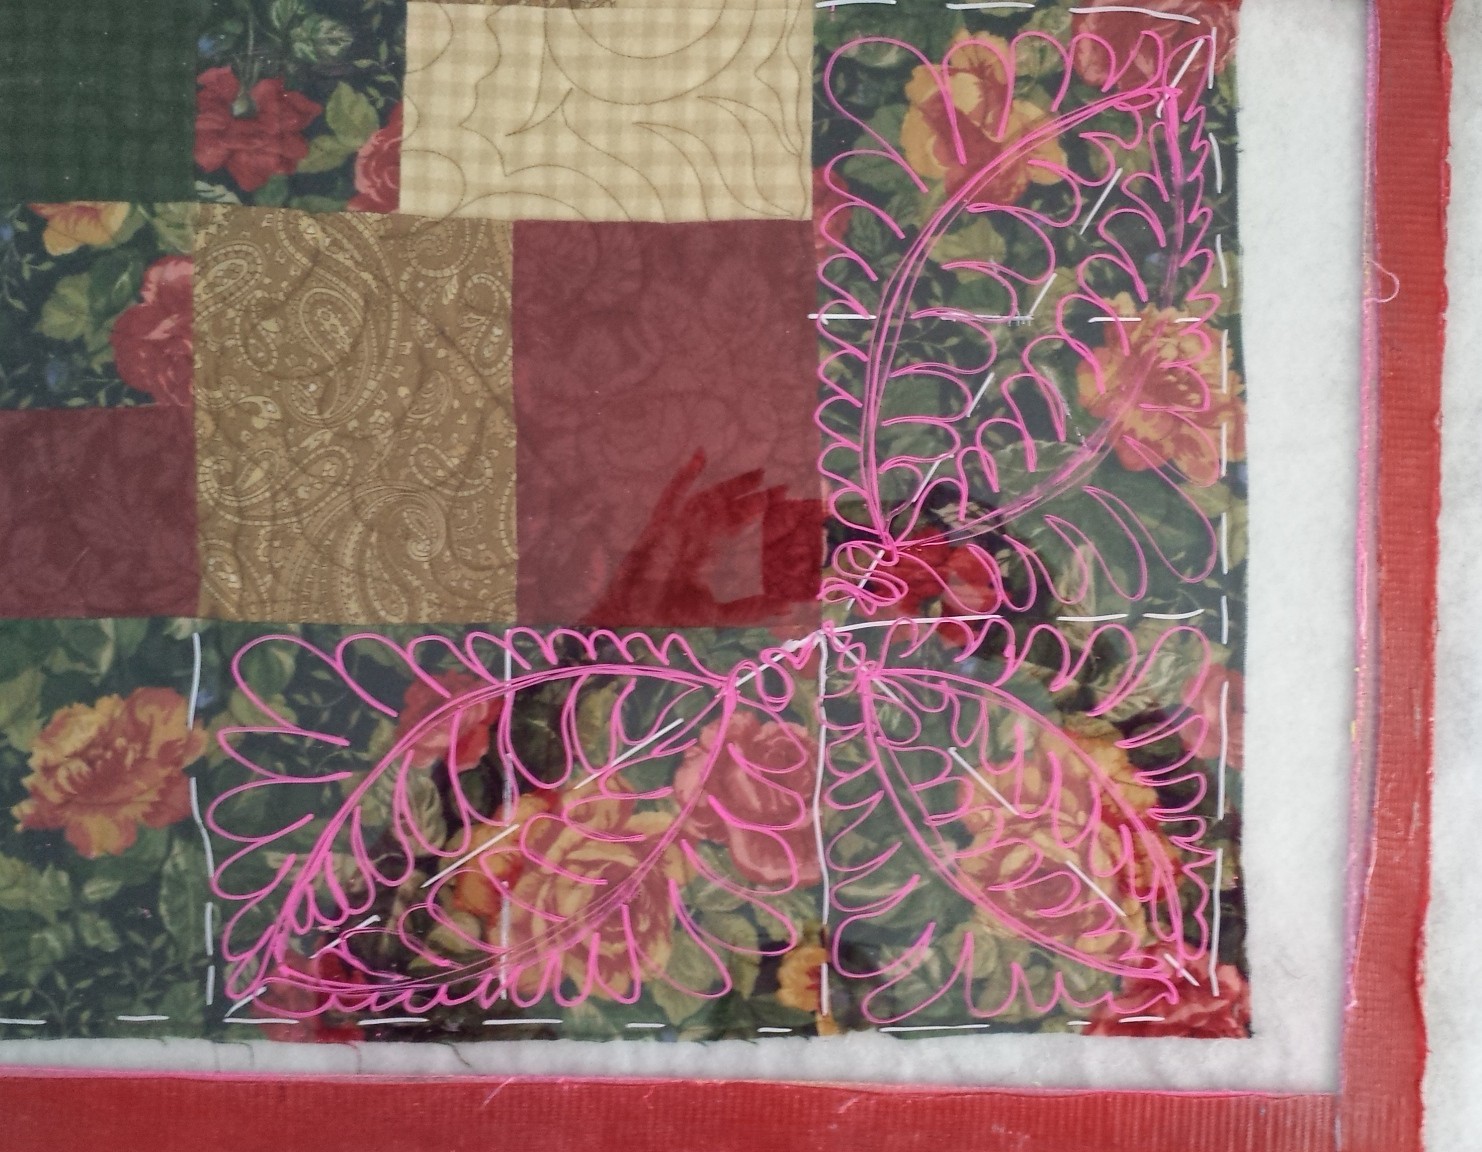
Here is a photo of the border design drawn out on the quilt border.

Feather Design in the border
I used the Expo Bright Stick markers on top of Plexiglas to draw the design. Click on the photo for a larger view.
The white lines are registration lines I marked on the quilt top and the pink lines are the quilting lines.
I used Signature cotton thread “Latte” for the quilting – you can’t see the stitching lines, just the texture.


