Is Custom Quilting Dead??

Over the last few months I have heard the following comment (or something similar) several times from people in different parts of the country – “I’m not doing custom quilting anymore. I can’t make enough $$$ with custom quilting.”

Personally, I think they are WRONG! You CAN make $$ (many times a LOT of $$$) custom quilting, but you need to be SMART about it, you need to be EFFICIENT with your quilting, and you need to price accordingly.

Let’s first define “custom quilting.” A while back, I asked the question “how would you define the term custom quilting?” Everyone who responded said the same thing – anything more than edge to edge quilting, is custom quilting. (To read this post and the comments Click Here)

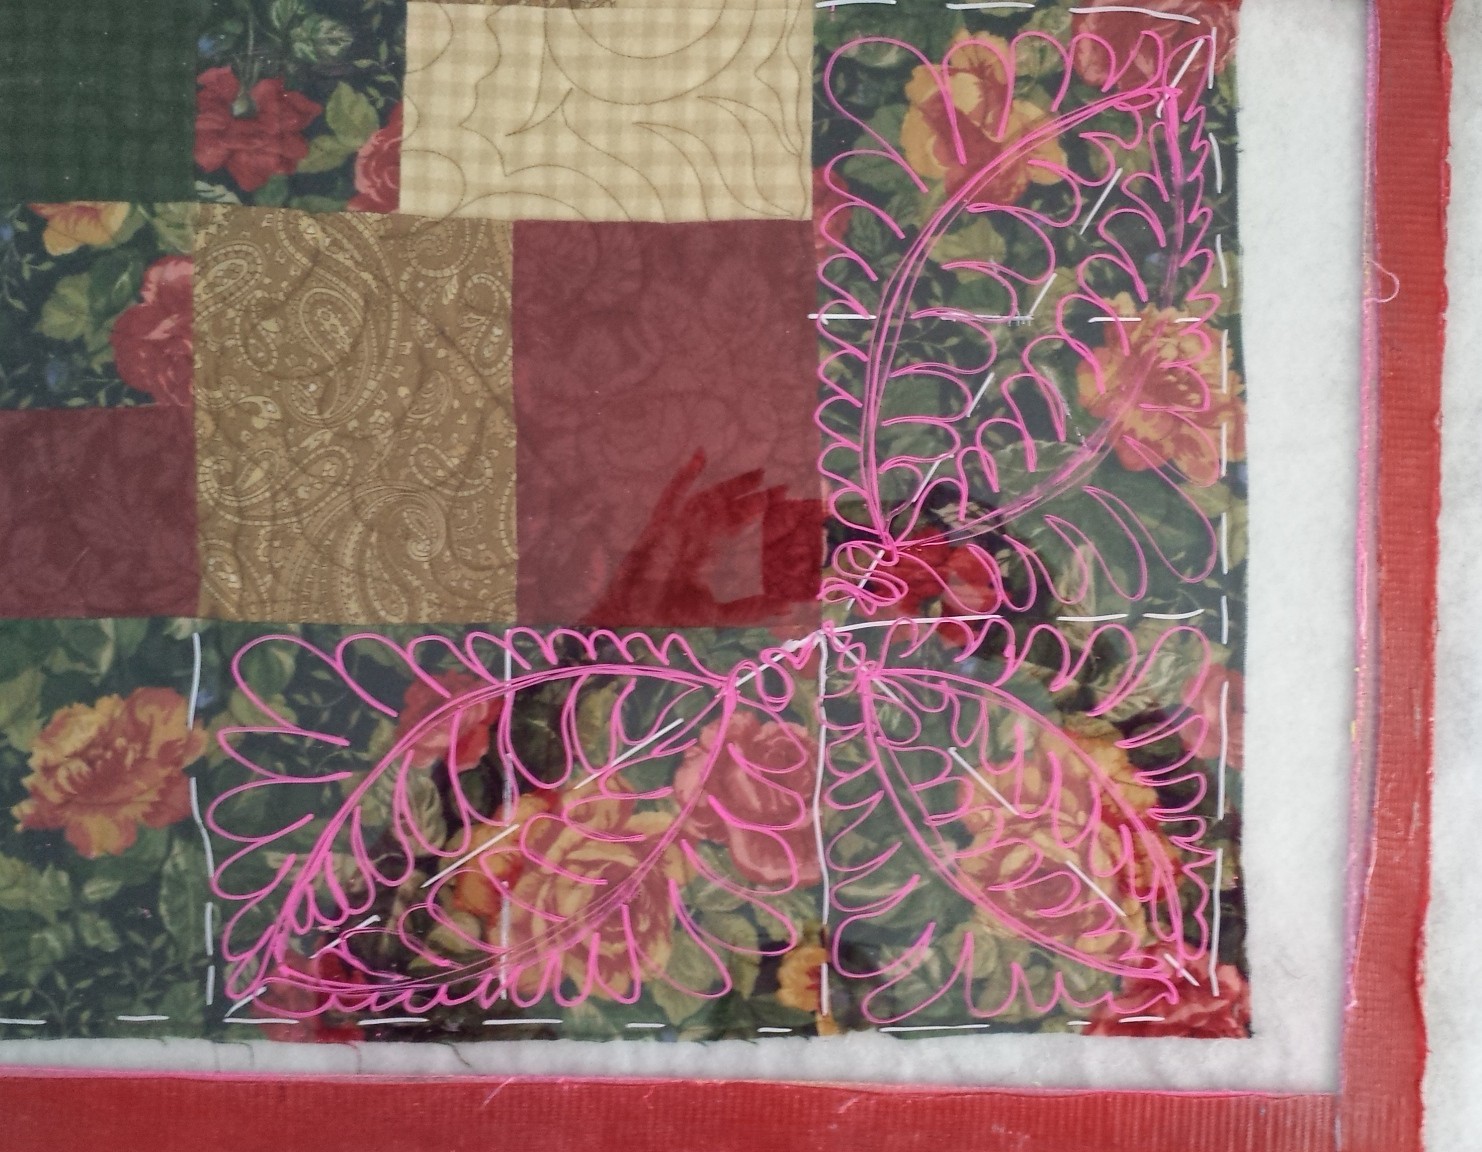
Let’s also define “edge to edge” quilting. Edge to edge quilting can be done with a (paper) pantograph, Groovy Boards, computerized or free hand. Edge to edge is quilting that is done from one (raw) edge of the quilt to the other (raw) edge of the quilt. And the pattern or design also goes from the top (raw) edge of the quilt to the bottom (raw) edge of the quilt. When the quilting is completed, there is typically only one distinct pattern or design on the quilt, resulting in all over “texture” of the quilting.

With many of the newer, more detailed and dense pantograph designs, especially some of the computerized designs, I personally feel, even though they are edge to edge designs, they really ARE custom quilting!

Personally, any quilting that is considered “custom” SHOULD cost more! And sometimes a LOT more!

Let’s talk about the quilting in custom quilting. I know everyone has seen the super duper, over the top, show stopping, drooling inducing, quilting. Maybe you have seen the photos online, in person or maybe you quilt like that in real life. Yes, these quilts are AH-MAZE-ING and prize worthy and, IMHO, should be charged big, big, bucks – like, there should be a comma in the price charged – for the time, talent, vision, imagination, and the effort involved in the quilting.

But what if you are working on something not so spectacular? You CAN do custom quilting and make some big, or at least decent, $$$ for YOUR time, talent and effort.

I just completed a “too stinkin’ cute” customer quilt with custom quilting that I completed in a fairly short amount of time and made some more than decent $$$ on it.

First, I want to talk about the quilt, then I’ll talk about the pricing.

The quilt is Gnome quilt that my customer made with Hawaiian fabrics for an island “vibe.” The quilt is going to be a gifted to a nephew and his family who live in Hawaii, and it is going to be hand delivered to them when a friend of my customer visits Hawaii on vacation in a few weeks.

The quilt pattern is A Tale of Two Gnomes, by Cotton Street Commons. My customer changed the pine trees from the pattern to coconut trees for the island vibe. Click on any photo for a larger view.

The quilt is 59 x 70 inches and the blocks are a combination of hand applique and piecing. At first I was thinking of doing a free hand all over design, but the applique on the trees was really thick and I couldn’t get my hopping foot or my needle through the thickness of the overlapping applique pieces.

I kept the “custom” quilting really simple and changed threads to match the fabric. I used high sheen polyester thread throughout the whole quilt and Warm & White batting.

I started with the blue borders – I went with a wavy line with blue variegated thread to mimic the motion of water. Because the blocks were all different sizes, where they all came together, I overlapped the horizontal and vertical wavy lines for a “fish net” look. The wavy lines overlapped somewhat randomly, meaning I didn’t plan or stress where the wavy lines overlapped in the quilt.

When all the blue was quilted in my workspace, I switched to white thread and did the background quilting of each block in the workspace. The white quilting in each block was done with only one start / stop and it was easy, peasy quilting – a combination of curved “spikes” in the beard and ribbon stipple in the background for the Gnomes and some curved spikes in the bottom half of the tree block and some loose outline and ribbon stipple around the top of the tree. It took me (literally) about 2 minutes to quilt the background in each block.

When the white quilting was finished in the first workspace, I changed back to the blue thread and quilted the Gnome hats then moved my quilt to the next workspace and began quilting the blue block borders and then the block background with the white thread. I continued “leap frogging” the thread colors in each workspace for the remainder of the quilting. I find that, for me, this is the most efficient way to quilt a quilt like this.

The whole quilt took me only three (3) hours to quilt which included putting the quilt on the machine. And, IMHO, the quilting looks good and it looks like I worked REALLY hard on it.

I have sent some photos of the quilting in progress to my customer and she LOVES the quilting!

This was a last-minute quilt that my customer made and asked if I could quilt it in only a few days. Fortunately for her, I had the time and I was able to do this for her. Because this was a rush job, AND a custom quilting job, I did charge more $$$ for my time and effort. Let’s talk numbers – the quilt was 59 x 70 inches which equals 4,130 square inches (si) and it took me 3 hours to complete.

4,130 si X .02 cents si = $82.60, divided by 3 hours equals $27.53 per hour
4,130 si X .03 cents si = $123.90, divided by 3 hours equals $41.30 per hour
4,130 si X .04 cents si = $165.20, divided by 3 hours equals $55.06 per hour
4,130 si X .05 cents si = $206.50, divided by 3 hours equals $68.83 per hour

I charged my customer the .05 cents si price, which she agreed to and signed and dated the worksheet!

Of course, if it took me longer to finish the quilt, the numbers would be different and I am not allowing for operating expenses, etc.

In addition, I provide the batting (Warm & White, twin size $22), thread (high sheen polyester, $10) and I put the binding on the front of the quilt ($53.75) and she will hand stitch the binding to the back. This gives a total of $292.25 for this quilt before state sales tax was added.

Custom quilting, IMHO, CAN BE PROFITABLE and by keeping the quitting simple, custom quilting can be done in a relatively / fairly short period of time which can make YOU more $$$.

I welcome your thoughts and comments. Please post your comments below or send them to me in an email at longarmu@aol.com

Your Customer Worksheet Online Class

I am hosting a NEW, LIVE, in person, Zoom class, Your Customer Worksheet and More!! on Tuesday, June 30, 2020 at 12 noon Pacific (3 pm Eastern) –

We will be talking about Customer Worksheets – why they are SO important, why you NEED one, what to have printed (disclaimers) on it and a WHOLE LOT MORE!! Including a little bit about pricing.

Also, we will also be talking about the Unhappy Customer. What do you do if this happens – and it WILL happen! Do you have policies in place so when you have an unhappy customer, you will be ready and can deal with the situation?

Do you know that your Customer Worksheet becomes a legal document? If your unhappy customer would take you to small claims court, your Customer Worksheet can be used to show what you did, or didn’t do.

This class will last about 2 hours or so. It will also be recorded. When you register for this class, you will get 90 days, 24/7 access to the class and all class handouts (downloadable pdf files.)

For more information and to register for Your Customer Worksheet and More!! Click Here 

I know that to many people, this is the “boring” part of the business!! In reality, this is the IMPORTANT part of being in business!!!

One more item – In early April I hosted a Zoom meeting about Machine Quilting Business During the Pandemic. This meeting was recorded and is now available as a FREE online class.

For details on the FREE online class, Your Machine Quilting Business During the Pandemic, Click Here

If you have any questions about any of these classes please contact me at longarmu@aol.com

I look forward to seeing you in class on Tuesday, June 30 at 12 noon Pacific (3 pm Eastern) 

A Pricing Survey

A few days ago, I posted about an upcoming class. Pricing Cost Analysis on March 23, 2020. (For information on this class, Click Here) As part of this class, we do a little exercise on what YOU would charge to quilt some quilt tops. I thought it would be interesting to do the same pricing exercise on this blog.

Here is how it works – this is totally voluntary and it is completely anonymous. I do NOT know who you are and I cannot “track” your answers. I am using Survey Monkey www.surveymonkey.com for the questions and answers. I do have a question at the end about your location. You can enter your State / Province or region (Midwest, Northwest, Deep South, New England, etc.)

Below are photos of four different quilts with all the information about them. The link to the pricing survey is included (and highlighted) in the quilt information. Each quilt / photo has a different survey. If you would like to answer the survey on all the quilts, you will have to answer four sets of questions. If you would like to do only one quilt survey,  you can do that. YOU choose how many surveys you would like to answer.

I will leave the links to the surveys “active” for a week or so and then I will close them.  I will compile the data and post the results here on the blog.

It will be interesting to see the range of the prices and if there are some other interesting data that is collected.

If you have any questions about any of this, contact me at longarmu@aol.com. Or, if you would like to send a private comment to me about this, send it to the same email. Feel free to leave a comment below in the comments box.

Please note – if you are attending the Pricing Cost Analysis class, the same quilts and photos will be posted, but it is a totally SEPARATE survey and will be open to only those who are attending the class.

About the quilts – I pieced each of these quilts about 15 or more years ago. I like using these quilt tops in this class because there is a wide range of piecing styles which will allow for many different quilting styles and quilting options.

Click on any photo for a larger view


Quilt #1 – Scraps & Chevrons, 55 x 55 inches
3,025 square inches, 21.0 square feet, 2.35 square yards
To take the pricing survey for the Scraps & Chevron Quilt
This survey is now closed

Quilt details
9 inch blocks with 1-1/2 inch sashings, 6-1/2 inch outer borders. The edges of the outer border are bias edges.


Quilt #2 – Winter Night, 61 x 76 inches
4,636 square inches, 32.20 square feet, 3.60 square yards
To take the pricing survey for the Winter Night quilt
This survey is now closed

Quilt details –
Outer border is a total of 9-1/2 inches – inner purple printed border is 1-1/2 inches, the pieced border area is 6 inches and the outer solid purple border is 2 inches. The snowflakes are 12 inches, the roofs are 6 inches deep.


Quilt #3 – Christmas Diamonds, 56 x 64 inches 
3,584 square inches, 24.9 square feet, 2.77 square yards
To take the pricing survey for the Christmas Diamonds quilt
This survey is now closed

Quit Details – 
Outer printed border is 6 inches, inner border is 2 inches, blocks are 8 inches


Quilt #4 – Double 9 Patch, 60 x 78 inches
4,680 square inches, 32.5 square feet, 3.61 square yards
To take the pricing survey for the Double 9 Patch quilt
This survey is now closed.

Quilt details –
The small red squares are 1-1/2 inches, the 9 Patches are 4-1/2 inches, the large “solid” square is 13-1/2 inches. The outside edges of the diagonal setting blocks are on the straight of grain


If you have any questions about the quilts, need more information or have any comments, please contact me at longarmu@aol.com

I look forward to seeing and compiling the data for each quilt!

The Process of Pricing

I recently taught a Longarm University, Machine Quilting Basics class, where I teach people how to use their longarm machine and how to run a successful machine quilting business. As part of this class, we do some role playing where they (the students or one designated student) is my customer, I am the (professional) quilter and we go through the steps of taking in a customer quilt.

I also do quilting for my favorite charity, American Hero Quilts. I usually have about 6 – 10 quilts that need to be quilted and when I’m done with them I drop them off and take a few more home for quilting.

In this class, I used one of the American Hero Quilts from my “stack” and we discussed quilting, timing, possible problems, etc., etc. The more I looked at that quilt, the more I WANTED to quilt it – like, right now!!! I had a lot of commitments coming up and knew I couldn’t quilt it, like, right now.

But life is strange! The commitments were postponed a week or two, and suddenly, there WAS time available to work on this quilt! So I did.

In the process of working on this quilt, I decided to write about my process of pricing a quilt, timing the quilting and other things. Unfortunately, I did not get a photo of the quilt before quilting, but you can see from the finished photos, the quilt turned out really, really nice!

Click on the photos for a larger view.

Let’s start at the beginning

This quilt is 67 x 85 inches (5,695 square inches) and nicely pieced. There were some thick seam joins, but the quilt laid mostly flat and square. (I have no clue who pieced the quilt.)

In all my many years of quilting and piecing, I don’t recall seeing a block setting like this quilt. (There may be an adaptation of it being made in the not too distant future.)

As I was looking at the quilt, I knew that an all over design, either a pantograph or a free hand all over design, was not going to be quilted on that quilt. I also “saw” lots and lots of feathers in the quilting! Which means that the quilt will be custom quilted. (Custom quilted being defined as different patterns in different parts of the quilt.)

I knew that I was going to change the color of thread to match the colors of the fabric.

I estimated that it would take 6 – 7 hours of quilting to complete this quilt.

With the above information, here is how I would determine a price for the quilting –

My base price for quilting (which is in my brain and NOT published anywhere – except here) is 3 cents per inch. So I did the math (5,695 psi x .03) and came up with $170.85. Which, for what I wanted to quilt, was TOO low. So I did the math again at .035 cents per square inch and came up with $199.32 which I rounded up to $200. This is a better price, but I knew the quilting would take more time, so I added another $50 and determined that $250 would be the LABOR ONLY price of the quilt.

Note: this price is for free hand quilting only. If I were going to use templates on any part of the quilt, I would add at least an EXTRA 25% minimum ($62.50 rounded up to at least $70) to the labor price.

If you want to take the math a step further, the price of $250 divided by 5,695 si = .0438 cents per square inch.

To recap, this quilt, 67 x 85 inches, will be free hand custom quilted with feathers, no templates, for $250.

When working with my customer, they know NOTHING about my calculations and they are presented with the labor only price.

I also estimated that there would be a $15 charge for thread and $15 for Soft & Bright (Warm Company) polyester batting, which was purchased wholesale.

For an blog article about the cost of thread Click Here

I am also putting the binding on – making the binding and applying it with my home sewing machine. For this I charge $3 per running / perimeter foot. This quilt has 26 running / perimeter feet x $3 = $78 for binding.

The total charge for this quilt (if I were charging for it) is

Quilting labor $250
Thread $ 15
Batting $ 15
Binding $ 78
Total $358 + any state sales taxes

Quilting Time

My quilting time break down is – (time is measured in hundredths – 15 minutes = .25, 30 minutes = .50, 45 minutes = .75

Putting the quilt on the machine: .50
Stitching time: 2.75 07/28/18
Stitching time: 3.00 07/29/18
Total hours 6.25 hours

Quilting details

All the quilting was done free hand. I did mark registration lines on the quilt top so that the curves of the feathers were consistent (not perfect). There was a little more time used because I changed my threads two or three times in each workspace** and I did “turn the quilt” to quilt the side borders. I chose to turn the quilt because I was using a different color of thread in the borders than in the body of the quilt. (For information on Turning the Quilt Click Here)

** I find that this is the most efficient way of quilting mostly equal sections of same color fabrics in a workspace.

Hours / Pricing break down

It took me a total of 6.25 hours to finish this quilt and I would be charging my customer $250. If you divide $250 by 6.25, that equals $40 per hour! Not too shabby!

Binding Break down

It has been a long while since I have actually timed myself on adding the binding to a quilt and I was very pleasantly surprised at the results. I estimated it would take me about 1-1/2 hours to put the binding on, but it took a little less than 1 hour!

Here are the details –

Making the binding – cut strips selvage to selvage, stitched them together and pressed wrong sides together: 20 minutes
Stitching the binding to the back of the quilt : 20 minutes
Top stitching the binding in place on the front of the quilt: 20 minutes
Total binding time 1 hour

Cost of binding $78, time to do it 1 hour. No math involved and I LIKE those numbers!!!

If you are not offering binding services, I beg you to re-consider. You are losing $$$ – a LOT of $$$!! I know that you will not bind every quilt that comes to you, but if you offer binding services, you CAN make a substantial profit!

I hope that this has given you some insight into how I price a quilting project and how the timing of your work on a project can help you determine if you are making a profit – or not!

I welcome your thoughts and comments. Please feel free to leave them in the Leave a Reply box below. Or, if you would prefer, you can send me an email at longarmu@aol.com

Timing Challenge Update

I received this email a few days ago –

I’m reporting on your challenge! I have taken your challenge and mostly been able to stick to it by using a stopwatch feature on my FitBit, and when I forget to hit the button, I guesstimated.

I recently did a batik throw, measuring 48 x 41. (1968 square inches) Originally I was going to do an allover pattern but the quilt “spoke” to me so I ended up doing more creative things on it. Here are my statistics.

Setup on longarm, including quick pressing, winding bobbins, pinning on and basting. – 0.75
Quilting Time – 1.0 + 0.5 + 2.5
Finishing Up – rough trim, bury threads I missed, check over and recheck, invoicing – .5
Total time 5.25 hours.

At 0.4 cents per square inch, that invoiced out at $78.72, or $14.99 per hour for my time, which isn’t bad, but my “hourly” rate is $25, so this quilt either took too long or I am not charging enough. Basically it should have taken me three hours start to finish based on a $25/hour labor rate. No way could I have done this amount of work in that time, unless I had stuck to my original plan of an all over design.

I have eight more quilts lined up to go so I will continue the challenge and see how things really are… It’s eye-opening!

Karyn Dornemann
www. karynquilts.com
(posted with the quilters permission)

Here are some photos of the quilting Karyn did – Please click on the photos to enlarge the view. I left the photos large so that you can see the detail of the quilting.


Karyn, I am glad to hear that you timed yourself when you were working on this quilt – which, by the way, is amazing! You did a fabulous job on the quilting!

I agree, timing your work IS eye opening! When something like this happens to me, I call it a “learning experience” and I hope that I do LEARN something from it.

I would like to make a couple of comments-

I think all quilters, at one time or another, have had a quilt “speak” to them and they change the original quilting designs to something else. It always seems that the change(s) will take more time and be more detailed quilting.

All of these changes are assumed to fall under the “do whatever you want / quilt as desired” statement and documented on the worksheet and approved by the quilt’s owner.

Personally, if I choose to quilt a more complex, detailed design, then I “absorb” the extra time and the (potential) loss of the extra quilting $$.

I do not add extra $$ to the cost of the quilting job after I give a written estimate to my customer. Think of how you feel if something costs more (possibly way more) than what you were told it was going to cost at the start! (Think car repairs!)

I will still keep track of the quilting time involved so that the next time I use that technique, pattern, template, etc., I will be able to give a more accurate estimate due to the extra time involved when using that technique, pattern, template, etc., on the next quilt.

Let’s say you are intaking a quilt and the customer says, “I really like what you did on so-and-so’s quilt, (or seen on another quilt someplace else) can you do it on my quilt?” You know what pattern / design / technique that she is talking about and you know that it will take longer to complete. Or, you suggest a pattern / technique / template, etc., and you KNOW that it will take more time to complete. Whatever the scenario, in your mind, figure out how many extra hours it will take – then by all means, ADD extra $$ to what you will charge to cover the extra time it will take to for you to complete the quilt!

Going back to my contractor example from a few posts ago – if you were working with a contractor on a home improvement and you wanted to add something that would take more time and effort for the contractor to do, wouldn’t the contractor charge extra for this? Then why shouldn’t you, as a “quilting contractor” do the same thing.

Recently, I was working on a customer quilt and I came up with a new border design using one of my templates. I knew it was going to take more time, but I didn’t know HOW much extra time it would actually take. My choice was to go ahead and use the new design and assume it would take extra time to quilt.

The quilt was 96 x 96 inches and I estimated about 2 hours for the (original design) border quilting. The actual quilting time for the border, using the new design, was 4 hours! This was a “learning experience” for me (one of many.) If I use that design again, my choice would be to add extra $$$ – a lot of extra $$$ – to my fee! OR, I can do less intense quilting in the body of the quilt (less time) and the more intense border quilting (more time) and between the two, they would equal the time for a “normal” quilt, which I would charge accordingly.

I know, this is all as clear as mud!!

Going back to the Karyn’s quilt in the email – small quilts are NOTORIOUS for taking a LOT longer to quilt! (Ask me how I know this!)

I know that I will look at a smaller quilt and think “if I do this more complex, time consuming technique /pattern, template, etc., it won’t take THAT long!” Guess what? Most of the time it does take longer (sometimes a lot longer) to finish!

With a small quilt, I will generally over estimate the time / cost of the quilting. If it takes significantly less time to quilt, I can always reduce the price of the quilting, which makes my customer happy. But if it takes longer to quilt, then at least I have some $$ for my time and effort.

Having these “learning experiences” is how we learn what techniques take more time, and on the flip side, which techniques take less time to quilt!

By timing your work, over time, you should get a bunch of averages. You should get an average amount of quilting time on a quilt, which you can break down to Queen size, King size, etc. You should also get an average price for your quilting, which you can, again, break down to techniques, such as average price for template work, free hand work, pantographs, etc.

From all of this, over time, you will be able to figure out if you are really making any $$ with your quilting!

Yes, I know we all are having way too much fun quilting, but, if you are quilting as a business – and many of you are quilting as your main source of income – then you NEED to KNOW all this information and you need to KNOW if you are making any $$.

As always, I welcome your comments and I hope to hear from more of you about your results from timing your work.

Post any comments in the comments box or if you would like to contact me personally, send me an email at longarmu@aol.com.

Challenge Update #1

Last month about this time I challenged you to time yourself when you are working on any quilt, whether it was for a customer, for a charity, for family or for yourself. I am hoping that by doing this, you have discovered some interesting information.

To begin discovering some of this interesting information, let’s start with the obvious.

To determine how much $$ you made per hour when working on an individual quilt, take the total hours worked on the quilt (from when you timed yourself on this quilt) and divide it into the price you are charging.

If you go back to my post from last month, (to view that post Click Here)I documented two customer quilts I worked on. The first one, Starry Night Quilt, 74 x 83 inches, took me 4.83 hours to quilt. I charged my customer $250 for the quilting labor. So, $250 divided by 4.83 = $51.75 per hour that I “made” when I was working on this quilt.

The other quilt I documented was All My Scraps are Stars, 91 x 108 inches, with a LOT of detail quilting. This quilt took me 14.57 (rounded down to 14.5) hours to quilt. I charged my customer $500 for the quilting labor. So, $500 divided by 14.5 = $34.48 per hour that I “made” when I was working on this quilt.

These numbers do not include any business or operating expenses or any self employment taxes. A very general calculation would be – one third of your hourly “wage” goes to business and operating expenses, another third goes to self employment taxes and possibly recovering the cost of your quilting machine, the remaining third is your profit or what you actually make! Yes, all this can be individualized to your personal situation.

If you track what you make per hour, per quilt, over time, you should be able to come up with two important pieces of information. You should determine 1) the average time it takes you to quilt a quilt – you can break that down into quilt sizes like King size, Queen size, etc. – and 2) you should be able to determine an average hourly rate / wage you are making when you are working on these quilts depending on the pattern / technique you are quilting.

For example – I can quilt a Queen size quilt with medium density, “light” custom, free hand quilting in about 6 – 8 hours. If I charge, on average, $300 to quilt a Queen size quilt, then my hourly “wage” will be between $50 – $37.50 per hour. ($300 divided by 6 hours = $50 per hour, $300 divided by 8 hours = $37.50 per hour.)

Knowing this information, when I am consulting with my customer about quilting designs – and I have been tracking the time it takes to quilt the patterns / designs / techniques – I can recommend quilting designs that are appropriate for that quilt, that I can quilt in 6 hours, maybe less, but no more than 8 hours.

Also knowing this information, if the quilt says it needs a pattern / design / technique that will take MORE time, then you can start raising your price accordingly for that project. Estimate how many extra hours it will take you to quilt the particular pattern / design / technique, multiply that by your hourly “wage” and add that to your price.

Example – Let’s take the Queen size quilt from above and even though I may be doing somewhat simple quilting in the body of the quilt (let’s assume there are many busy prints in the body of the quilt) my customer decides she wants a feathered cable design in the border. I quilt the feathered cable design with templates, which is a more complex, time consuming technique. I have to determine HOW much extra time I will need to quilt this border design. Let’s assume that I estimate that it will take an extra 3 hours to quilt the border. For simplicity’s sake, let’s say I have an hourly wage of $30 per hour. Because I KNOW all this information, I will ADD an additional three hours to my estimated time of quilting and ADD an additional 3 hours of my hourly wage to this quilt ($30 x 3 = $90, rounded up to $100 to make things easy.) An estimated price then would be in the $400 range, for quilting labor only!! Batting, backing, thread and binding are all charged separately and not included in this price.

What if you don’t know how much extra time it will take you to quilt a different pattern / design / technique? Then I add percentages such as an extra 25%, 50%, 75% or more, depending on the complexity or difficulty of the quilting.

For our Queen size example from above with $300 for “basic” quilting, 25% extra would be $75, which I would probably round up to $100, which is about 30% of the basic price, 50% extra would be an additional $150, etc.

I can hear some of you right now saying, “Cindy, you are a crazy woman!! I could NEVER charge my customers that much money for my quilting!!” And I would answer you by saying “Why not???”

YOU are a highly trained, skilled, professional person. If machine quilting were so “simple” your customer could do it themselves – but they don’t. YOU have invested thousands and thousands of dollars into your quilting machine. YOU have invested hours and hours of your life learning how to use your quilting machine. YOU have invested more hours and hours and hours practicing, practicing, practicing your quilting skills. YOU can do things with your quilting machine that your customer CAN’T do and they are paying YOU to do this!

I travel around the country and talk to other quilters about their businesses. So many quilters are “locked” into the length x width x XX cents per square inch pricing. They will do all sorts of fancy, complex quilting – free hand, pantograph, computerized, templates, etc. – and NEVER charge anything more than length x width x XX cents per square inch, AND they will spend HOURS AND HOURS AND HOURS working on the quilt with NO idea of how many $$$ they are making (or loosing) per hour!

Let’s say you are thinking of putting a deck or porch on the back of your house. You want the deck to be 7-1/2 feet x 9 feet. You talk to a contractor about this and he says a basic deck / porch, no railings, nothing fancy will be $500. You think that having railings around the deck / porch might be a good idea, especially when the kids and /or grand kids come to visit. You also say that you would like to have a cover over the deck / porch, seats built into the railings and some planter boxes on the top of the railings. Is the contractor going to do all of the extras for the same $500 cost? I don’t think so!! He would – and he should – raise the price he is charging you according to what you want to have done to your deck / porch.

Why are YOU any different from the contractor in this example? If you haven’t figured it out, 7-1/2 x 9 feet is 90 x 108 inches, the same size as a Queen size, pre-cut batting! Think of yourself as a “quilting contractor” – the more quilting your customer wants, the more YOU SHOULD be charging for it, and they should and WILL pay for it!

Trust me, I have a LOT more to say about this, but for now, let’s finish with this – keep timing yourself on every quilt you work on. Begin to collate and group your information by quilt size, technique, pattern, etc., and see what information is starting to emerge about YOUR quilting.

As always, please leave a comment – I WILL be wearing my flame proof underwear or maybe I should make it a flame proof suit!

If you would like, send me a personal email at longarmu@aol.com

A Post on Pricing

While I was on a FaceBook group, someone posted this link to a blog about pricing items for sale. I read the blog post and it is a great post and brings up many different thoughts and comments on pricing. The pricing that is talked about in the blog post is for hand made items such as knit, sewn, crocheted, jewelry, etc., but the information is just as accurate and timely for a machine quilting business.

The blogger who wrote this is in the UK so the pricing is done in “pounds” not dollars – just substitute a $ for the pound sign.

To view the blog post Click Here 

PS Usually summer is a slow time for machine quilters. If it is slow for you, what a GREAT time to raise your prices. Then, when things pick up in the fall, your prices are higher and you will be making more $$$!!

Let me know your thoughts about this blog post.


Playing the Pricing Game

I belong to a couple of Facebook groups where people post photos of the projects they are working on or have completed. These groups are open to quilters of all skill levels – there are some professional machine quilters but most are “regular” piecers and (home sewing machine) quilters. Some of the quilt photos that are posted are quilted, most are not.

As I was cruising the photos I noticed photos of a very, very nicely, professionally quilted quilt. Then I read the caption with the photos, which read in part,

“The quilting took 10 days and 15+ bobbins…. the client is thrilled.” That REALLY caught my attention!

Note: I am specifically NOT posting the name of the Facebook group or the name of the quilter, who I don’t know. I have NO issue with the quilting that was done on this quilt and I am not criticizing the quality of the work.

From what I saw in the photos, and making a few assumptions, the quilt looked like it was a larger quilt, maybe even a King Size and it had a LOT of quilting on it. From looking at the photos, there appeared to be no ruler work, just all free hand. (The caption also said ” I don’t have a computer, this is all hand guided.”)

With this all stated, let’s begin to play the “pricing game.”

The quilter states that it took her 10 days to quilt this particular quilt. To me, that is worthless information. Did the quilter work on this quilt 10 – 12 hours per day or, did she work on this quilt when she had family visiting and could quilt only one hour a day?

(The quilting, which is very nice, is not THAT difficult to quilt and I probably could have done it in about 10 hours. There were a lot of feathers and free hand horizontal and vertical line fill in stitching. Also, in the Comments section, someone asked how long she had been quilting and she stated she has been quilting for 18 years.)

Let’s assume that the quilter DID work on this quilt for 8 hours a day. Let’s also assume that during that 8 hours she took a couple of potty breaks, a lunch break and had a couple of phone calls, for a total working time (standing at the quilting machine, actually working on the quilt) of 6 hours per day.

So with the assumption of 6 hours of working time, multiplied by 10 days equals a total of 60 hours working on this quilt.

Let’s do some math – Let’s assume she charged the customer per hour for this job.

60 hours x $10 per hour = $600
60 hours x $15 per hour = $900
60 hours x $20 per hour = $1,200
60 hours x $25 per hour = $1,500
60 hours x $30 per hour = $1,800

I am willing to bet that the price she charged was NO WHERE NEAR these numbers!

I looked up her name on the internet and found a website that had her name on it. (I am assuming that the person on the website is the same person who quilted this quilt. ) On her website she had her quilting prices listed.

Here is the price posted on the website –

“Custom quilting – $0.025 to $0.030 (per square inch) depending on the intensity of the quilting.”

Let’s do some more math –

Let’s assume that this was a Queen Size quilt, 90 x 108 inches, which is 9,720 square inches (si). At her high end of 3 cents per square inch, the total labor cost would be $291.60! (9,720 x .03 = 291.6) Let’s be nice and round that up to $300.

Let’s take the (assumed) 60 hours of quilting time and divide that into $300, which equals an hourly rate of – drum roll please! – $5 per hour!!!

Let’s assume this is a King Size quilt, 120 x 120 inches, which is 14,400si. Doing the same math as above ( 14,440 x .03 = $432) the hourly rate would raise dramatically to ….. wait for it ……… $7.20 per hour!!!

FWIW – the national minimum wage is $7.25 per hour (http://www.dol.gov/whd/minwage/america.htm, the minimum wage in Washington State where I live is $9.47 per hour and in Seattle, the minimum wage is now $15 per hour!

You can draw your own conclusions about this!

Why do I bring this up and write about this? I feel that many, if not most, professional machine quilters FORGET to add the numbers of hours they take to complete a quilt into their pricing equation.

Using the King and Queen size examples above, if the quilter could have done the quilting in 10 hours, her hourly wage would be about $30 per hour for the Queen size quilt and about $43 per hour for the King size!

And remember, you need to allow for your business expenses from these numbers!

I highly recommend that you begin to time yourself when you are working on EACH and EVERY quilt. You are not playing “beat the clock” to get a quilt completed in a certain amount of time. You are trying to determine how much TIME it is taking you, on average, to complete a quilt.

When you are standing at your machine, working on a quilt, write down the date and your start and stop time. Then, when you are finished with that project, total your hours and then divide that into the $$$ you are charging to find out how much you are earning per hour.

I know you will be amazed at the (low) hourly wage you are making.

How can you change this? I’ll write about that in the next post.

For the record – the last quilt I worked on was a large 93 x 110, Yellow Brick Road flannel quilt. It took me 4 days to complete the quilting. I did free hand feathers and swirls in the body of the quilt and a little more detailed free hand feather design in the borders. I put the quilt on the machine so that the long edge was attached to my leaders.

Sherrees-Quilt

Click on the photo for a larger view

Note: I drove a school bus for nearly 20 years and we did our time cards, etc., in hundredths. So 15 minutes would be .25, 30 minutes would be .50, 45 minutes would be .75. This is how I keep track of my time when working on quilts and it is easy (to me) to calculate.

Day 1 – put quilt on the machine – .75 (45 minutes)

Day 2 – marked and quilted most of the top (as attached to the machine) border – .75

Day 3 – remainder of top border and body of the quilt – .75 + .75. Total of 1.5 hours.

Note: I was having problems with a sore muscle in my right arm and could only quilt about 45 minutes at a time before having to stop and rest.

Day 4 – two sessions of .75 each and 1 session of 1 hour. Total 2.5 hours

Total time worked on this 5.5 hours and I added an extra .5 “just because”, for a grand total of 6 hours working on this quilt.

I charged my customer $375 for the labor (93 x 110 = 10,230si x .035 = $358, rounded up to $375) which I divided by 6 hours = $62.50 per hour!

You can draw your own conclusions about this!

I welcome your thoughts and comments!

—————————————-

I received a comment about quilting the borders and I have been trying to post a photo in the comments reply section and I couldn’t do it. So I’m responding here –

No, I did not have to turn the quilt. I was able to quilt the border design at the same time that I quilted the body of the quilt.

Here is a photo of the border design drawn out on the quilt border.

Feather Design in the border

Feather Design in the border

I used the Expo Bright Stick markers on top of Plexiglas to draw the design. Click on the photo for a larger view.

The white lines are registration lines I marked on the quilt top and the pink lines are the quilting lines.

I used Signature cotton thread “Latte” for the quilting – you can’t see the stitching lines, just the texture.